Experimenting while drying seeds

When you boil grain, beans for instance, it is common to let them soak on water overnight to hydrate and thus get soft quicker when cooking.  I regularly prepare a “snack” of roasted soy beans which goes through a similar process: soak overnight, cook on a pressure cooker, drain, then gently dry at a moderately high temperature.  I’ve decided to monitor the amount of water on each step, using the weight of the grain as a proxy, since I don’t have an easy way to estimate or measure water contents on grain.

The steps in the process

  1. The soy grains are weighted as they come out of the package, to get a baseline
  2. Grains are washed a couple times, then rinsed; weighted again to estimate how much water was left after rinsing
  3. Left to soak in water overnight (for about 14 hours)
  4. Cooked on a mechanical pressure cooker, for about 1h total, or about 45min under pressure
  5. Drained and left to air-dry for 10min
  6. Dried in an oven, over slow heat, for 24h

Results of weighting at each step

Step Weight (in grams)
Out of the bag 1020
Washed and drained 1130
Soaked 2290
Added salt 30
Added spices 7
Cooked and air dried 2430
Oven dried 788


Conclusion

The final product weights about 80% of what the original beans weighted out of the bag. Judging only by looks and feel to the touch, I’d expected less, perhaps 60%.  Also, soaking more than doubles the weight of the grain, and at that step my instinctive feel pointed to less, perhaps a 50-80% weight gain due to hydration.  Goes to show how interesting it is to measure those things.

Hailstone Sequence

Take a number; if it is even, divide it by two (N’ = N/2), if it is odd, multiply it by three and then add one (N’ = N*3 + 1).  Keep repeating these simple steps until you reach the result of N=1.  This simple sequence is often called a “hailstone sequence” because the intermediate results sometimes go up, sometimes down, sort of like the path a small piece of ice follows inside a cloud, until it grows too large and falls down as hail.

If you start with N=1, you’re already at the end, so no further operations allowed.  for N=2, you divide it by 2 and then you’re done, in one iteration. For number 3 it starts to get more interesting, as it takes a total of 7 iterations to complete the sequence:

3 ->  10 ->  5 ->  16 ->  8 ->  4 ->  2 ->  1

Number four is boring (4 -> 2 -> 1) and five is not much better (5 -> 16 -> 8 -> 4 -> 2 -> 1). We only get to do better than three above with six, which take one more iteration than three to complete:

6 -> 3 -> 10 -> 5 -> 16 -> 8 -> 4 -> 2 -> 1

Most numbers have fairly sort “runs”, while a few yield longer sequences.  If we investigate the length of the next biggest sequence for ever increasing values of N, we see something like this for the first one thousand integers:

1: 0
2: 1
3: 7
6: 8
7: 16
9: 19
18: 20
25: 23
27: 111
54: 112
73: 115
97: 118
129: 121
171: 124
231: 127
313: 130
327: 143
649: 144
703: 170
871: 178

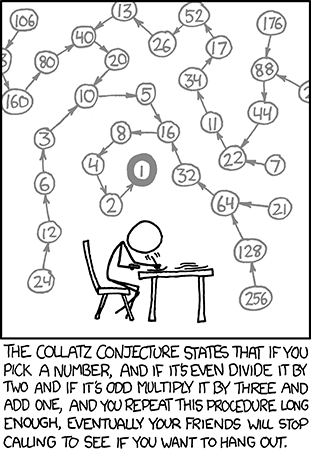
It gets progressively harder to beat these scores. Does every sequence always eventually collapse to one? Supposedly, yes, and this is known as the Collatz conjecture, after German mathematician Lothar Collatz. The hard part has been to formally prove the conjecture to be true.  This problem is so infamous among mathematicians that I rather think the following xkcd is rather appropriate:

Collatz Conjecture

If you think about each number in the form of a node in a directed graph, then a particular node N for any number will have an outgoing edge towards N/2 (if N is even) or towards N*3+1 (if N is odd).  As for edges incoming towards N, there’s *always* an edge from node N*2 towards N – that is because for any integer N, N*2 is always an even number, and thus will have an edge directed towards N. There may be an additional incoming edge towards node N if the result of (N-1)/3 is an integer odd number – for instance, if N=16, (N-1)/3 is 5, and thus there is an edge 5 -> 16 (because the next iteration for 5 is “times 3 plus 1”, and 5*3+1 = 16.  This can be depicted as follows:

graph_1

Generalizing the above, we can see that for the space of the positive integers, we can construct a graph where in the form N->N’ and every node will have a single outgoing edge. Because sometimes a node will have two incoming edges, some sequences will “merge” and follow a single path from that point forward.  No sequence ever “splits” (that is, there is never more than one outgoing edge for each node), and so eventually all sequences merge in the final sequence 2->1

Plotting the graph for the first 1000 sequences, we can see some of the paths that emerge:

graph_2.png

If we adjust the layout to better isolate the sequences, things look prettier:

graph_3

Which can lead to some neat animations: (the image below is a rather large animated GIF, it may take a while to load and start “animating”)

graph_4

Finally, while I was composing this post, I left my simple hailstone calculator running in order to see what would be the largest sequence it would find. As of this point, the largest sequence found by the program has 956 iterations, and it starts with number 226,588,897.  The complete set of ever increasing “records” is the following:

1: 0
2: 1
3: 7 
6: 8 
7: 16 
9: 19 
18: 20 
25: 23 
27: 111 
54: 112 
73: 115 
97: 118 
129: 121 
171: 124 
231: 127 
313: 130 
327: 143 
649: 144 
703: 170 
871: 178 
1161: 181 
2223: 182 
2463: 208 
2919: 216 
3711: 237 
6171: 261 
10971: 267 
13255: 275 
17647: 278 
23529: 281 
26623: 307 
34239: 310 
35655: 323 
52527: 339 
77031: 350 
106239: 353 
142587: 374 
156159: 382 
216367: 385 
230631: 442 
410011: 448 
511935: 469 
626331: 508 
837799: 524 
1117065: 527 
1501353: 530 
1723519: 556 
2298025: 559 
3064033: 562 
3542887: 583 
3732423: 596 
5649499: 612 
6649279: 664 
8400511: 685 
11200681: 688 
14934241: 691 
15733191: 704 
31466382: 705 
36791535: 744 
63728127: 949 
127456254: 950 
169941673: 953 
226588897: 956

Using ESPHome to program ESP8266 and ESP32 boards

ESPHome (https://esphome.io/) is a fantastic project for writing code for Epressif’s ESP8266 and ESP32 system-on-a-chip boards.  It is not a general-purpose tool, since it targets those two platforms, and the firmware you create with it, while can have some general application, is geared towards connecting your ESP device with the Home Assistant home automation platform (https://www.home-assistant.io/)

For a more general-use tool (but without the connection to Home Assistant), look for Platform.IO (http://platform.io/). Since my goal is connecting devices to Home Assistant, I’ll focus on ESPHome on this series of short posts.

_images/logo-text.svg

Installing ESPHome

There are two official ways to get ESPHome installed. If you’re running Home Assistant via the hass.io RaspberryPI installer, then it may be more convenient to install ESPHome as an add-on. In that case, follow this guide: getting_started_hassio

My personal preference is to run EPSHome as tool on my main development computer, and not on HA, and as a result the steps below follow this other guide: getting_started_command_line

Pre-requisites

  • Python: ESPHome (and platform.io) is built on top of python; as of version 1.14.0 (current release), ESPHome supports both python 2.x and 3.x, but support for 2.x will be dropped soon, so go ahead and install Python 3.x (3.8.0 is current)
  • Pip: you also need to have python’s package manager, pip;

Installing

$ pip install esphome

That’s all there is to it; after all dependencies have been fetched, you should be all set.

Testing the install and creating a simple device config file

To ensure that the installation succeeded, check the version of the tool:

$ esphome . version
Version: 1.14.0

ESPHome creates the firmware for your devices using configuration files in YAML format which describe the device, what peripherals are connected and what functionality we want to enable.  To create a very simple first config file we can use the wizard feature:

$ esphome my_first_device.yaml wizard

The wizard will ask a few questions; for this experiment, respond as follow:

  1. Step 1 : name
    Answer: my_first_device
  2. Step 2 : ESP device
    Answer:  ESP8266
  3. Step 2: Board
    Answer: NodeMCUv2
  4. Step 3: Wifi ssid
    Answer: the name of your WiFi network (case-sensitive, watch-out!)
  5. Step 3: Wifi ssid
    Answer: the password to your WiFi network
  6. Step 4: OTA
    Answer: a password for over-the-air (OTA) firmware updates

If all goes well, a named my_first_device.yaml should’ve been created, with contents similar to the following:

esphome:
  name: my_first_device
  platform: ESP8266
  board: nodemcuv2

wifi:
  ssid: "dummy"
  password: "dummy"

# Enable logging
logger:

# Enable Home Assistant API
api:
  password: "dummy"

ota:
  password: "dummy"

Don’t worry if the file looks slightly different; some options vary on different versions.

Next steps

Future posts will cover some other topics, including:

  • How to validate and build this configuration
  • Uploading the resulting firmware to an actual device via a serial connection
  • Over-the-air updates
  • Removing secrets (such as the WiFi password) from the config file
  • Adding sensors and other capabilities

Consumer devices getting better security

My ISP just replaced the optical fiber modem and wireless router devices they provided with a model+router combo from Huawei.  Besides being a very good device with (slightly) better WiFi range than the TP-Link it replaced, I’ve noticed that this product (Huawei EchoLife HS8546) has built-in protection against password brute-force attacks:

2019-08 Huawei bot protection.png

Nice to see; this is probably going to become standard across the board soon, but right now this is the first I’ve seen this (not that I’m on the market for WiFi routers frequently, but still…)